Version #1- For use with phones and tablets. Drill and saw required.

Materials needed:
12×17” wood plank, min ½” thick
2x 1×1” square dowels 12” long
4x ½” round dowels 24” long
12×17” clear plastic serving tray or plexiglass. *If you find a tray of different dimensions, you’ll need to adjust the size of the wooden base to match.
4x 1 or 2” thumb screws
2x large rubber bands or masking tape to hold the device in place
Tools Needed:
Hand Drill, Hammer or mallet, 2- 4 clamps, ½” forcner bit, 11/64 or 3/16 drill bit, 31/64 drill bit, wood glueSaw to cut wood (your hardware store might do this for you)
Apply wood glue evenly along one side of each of the 12” square dowels. Attach them to the underside of your wood base and clamp them together for 20-30minutes.

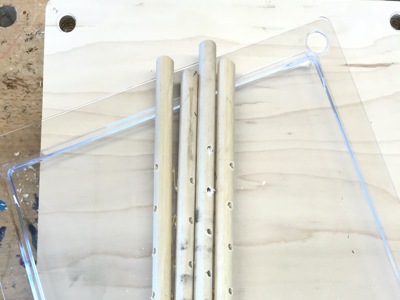
While the glue is drying, clamp one of the dowels so that about 4” of the end is hanging off the edge of the table (or use a vice like the one pictured here if you have one). Mark the dowel with 3-4 points where you’ll put holes for the thumb screws to go in to hold the plexiglass up. Multiple holes will make the hight of your stage adjustable. We’d suggest maybe starting with the first hole at least 1” from the top of the dowel and then adding 2-3 more holes 1” apart from there. It’s tricky to drill into a round dowel and have the bit go in straight. You can try starting the hole by pushing a nail in. This dimple will help guide the drill bit. Start very slowly with the 11/64 or 3/16 drill bit (slightly larger than the diameter of your thumb screws) until you know it is going in straight and drill all the way through to the other side. Repeat on all 4 dowels.

Once the glue between the square dowels and the base is dry enough that they do not move when you wiggle them, you’ll drill the holes for the round dowels to stand in. Measure and mark ½” in from both sides of each corner of the 12x17” wooden base to mark where the holes for the ½” dowels will go.
Using a drill bit that’s just smaller than the dowel you have, drill into each marked corner. (For a ½” dowel, you would use the 31/64 bit.) The hole should go all the way through the wood plank and ½ way into the square dowel underneath. This way the dowel will be far enough into the wood base to keep it upright and sturdy. You may need to use a mallet or hammer to tap the dowels into the holes. If it is too tight, move up to the next biggest drill bit.
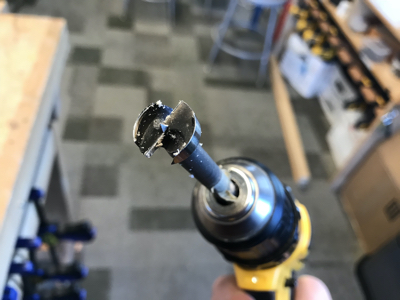
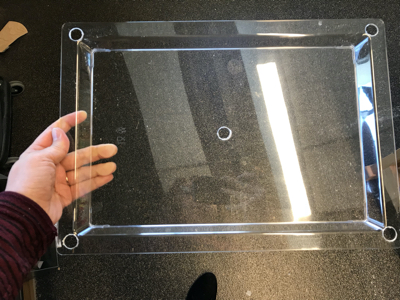
Lastly, we’ll need to drill some holes into the clear plastic piece you have for the top of the stage. You’ll need the measure and mark the very center of the plastic. This is where the camera of the phone or tablet will be positioned. Then, you’ll need to mark the four corners for the round dowels. This can be done easily by just placing the plastic over the already drilled base wood. You can then mark the center of each hole with a sharpie. Use the ½” forcner bit for all 5 of these holes. This bit is the only one we tried that didn’t crack or mangle the plastic. Go very slowly and gently without too much pressure.
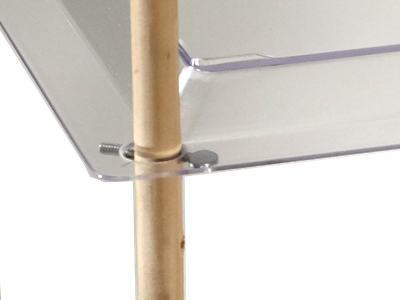
To assemble, place the four dowels in the holes in the base. Then position the device you’ll be using with the camera over the center hole on the plastic tray. Use the rubber bands or masking tape to hold it in place. Then bring the plastic tray over the dowels, slipping them through the holes in the tray. Have a friend or student watch the screen to see how low the tray needs to come in order to fill the screen with the base wood plank. Lastly, insert the thumb screws into the closest hole on each dowel and let the tray rest on them.
FINISHED!
We like these stands for mobile afterschool programs who might need to set up stop-motion workshops many times. They pack up flat, are quick to assemble and work with any phone or tablet with a built-in camera.