AFTER-SCHOOL EDUCATOR GUIDE
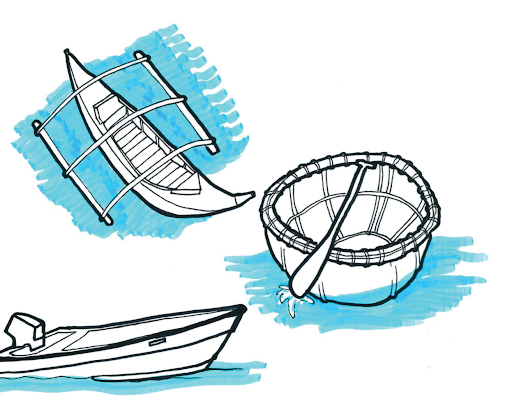
Throughout the years we have learned that kids love activities that involve water and they love projects that move too. This boat project accomplishes both of these goals. The magic of paper boats is that recycled paper is not meant to float. After an hour of design, construction, and iteration, young people can make working boats out of paper.

While they can easily be made with scissors and pencil, we’ve been making them with the craft cutter. Starting with a basic template, the lines can be quickly stretched, cut, and re-drawn to change the shape of the boat. Students customize the design of their boats based on their narrative or aesthetic while exploring scientific concepts like buoyancy, motion, 2D to 3D geometry, material reuse, and structural design.
Boats often feel familiar to young people with possible connections to home, stories of migration, and historical and community practices. Each boat can be built for well under a dollar. In fact, the boats can be built almost entirely from the contents of any recycling bin.
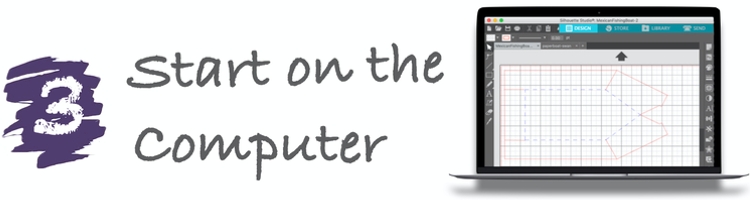
We like using the craft cutter for paper boats because designing digitally allows for more precise attention to symmetry and cuts with finer detail than most of us can do with scissors. The image of the boat can be designed directly in the computer or drawn with pencil and paper and scanned into the free program for editing and cutting. This design process is similar to what’s needed for more complex digital cutting tools such as laser cutters and CNC machines. Making the computational thinking skills that young people use translatable to future work that may use 3D rendering software and manufacturing technology.

We’ve also found this project to be one of the most iterable designs. A student can cut the template design, test it in a bowl of water or a puddle and then come back to the computer to change the shape and cut a new one. This can be repeated many times without using much materials and without the lengthy repetitive processes that some building can entail.
SOURCING FREE RECYCLED MATERIALS
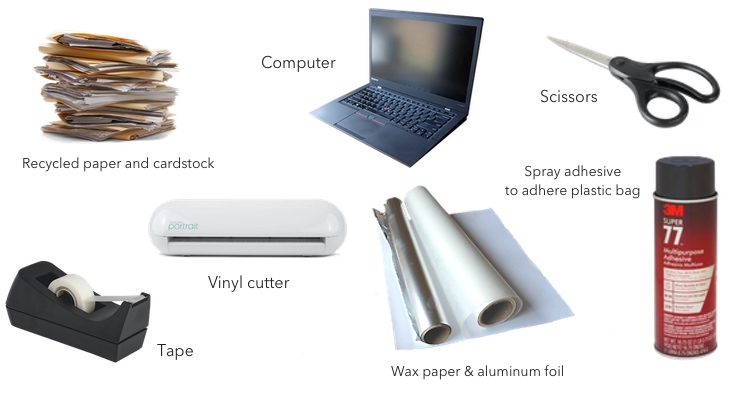
Purchasing new materials for large classes can become expensive and bad for the environment. You don’t have to get high quality materials, there are some cheaper options that can work just as well.
Paper
Recycling bins at schools and offices are usually full of gently used paper that can substitute for cardstock. If you find your boat is too flimsy with one sheet of paper, you can cut more than one copy of your design, layer them, and join the edges with tape or glue.
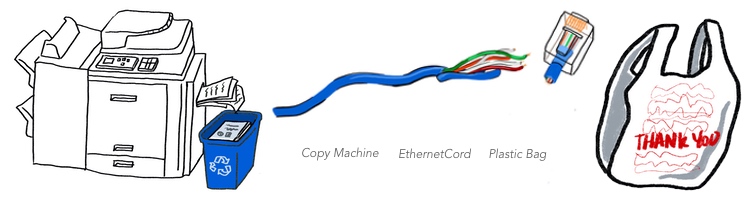
Electrical Wire
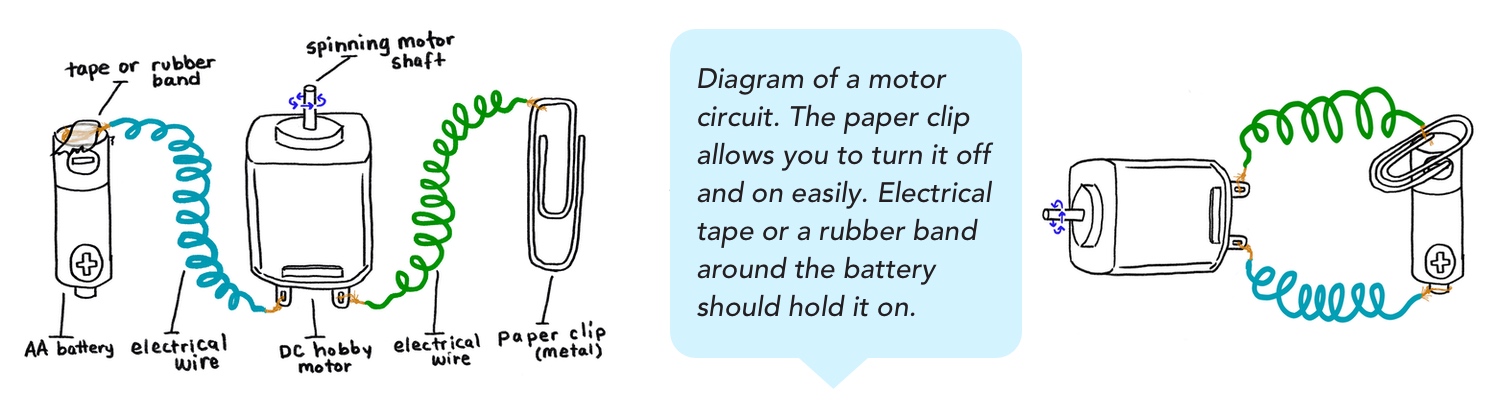
If you have an old phone cord or ethernet cable laying around, you can carefully slice the outer casing off and you’ll find a bundle of smaller wires inside! These are excellent wires to use in low-voltage applications like the hobby motors.
Plastic
There are too many plastic bags in the landfills. We like to source recycled plastic bags to line the outside of the boats. If this isn’t possible we find that using wax paper and tin foil can support the boats.
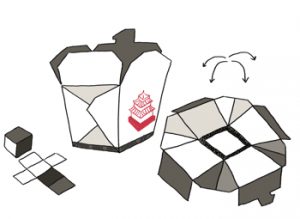
We’ve found that it’s helpful to offer some preliminary experiences before getting started so that youth are oriented to the ideas they’ll be working with. You can take apart paper hamburger trays or take-out boxes to see how they look flat. By disassembling everyday items, the task of creating their own boat from scratch becomes much less daunting for students and they begin to anticipate what kinds of designs will be possible.
PROJECT PROCESSES
Design
Here are three possible entry points for helping kids get started designing their boat:
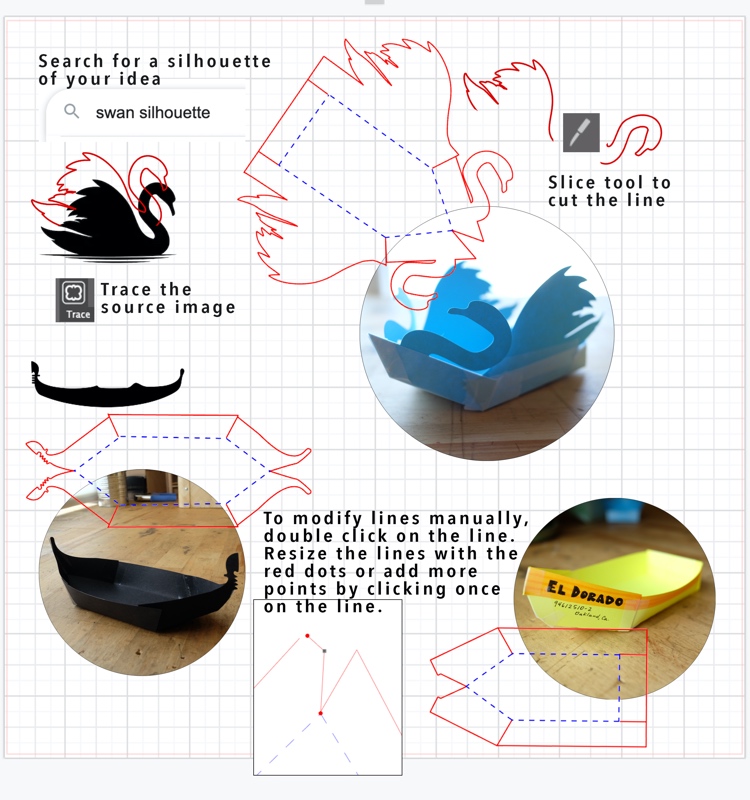
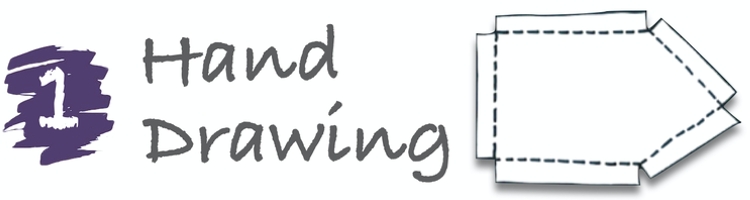 Students can start by drawing their boat idea by hand. Having a few example drawings for reference is helpful. Once they are done, you can take a photo of the drawing and bring it into the craft cutter software. This is a good option especially if you don’t have one computer per student.
 You can print out several copies of a basic boat template that students can cut and assemble with scissors and tape so that they can try it out and think about what customizations or improvements they want to make to their own design. Have the same design ready in the craft cutter software so they can edit the template they made.
 We usually offer this template design click to download for students to start with. It’s helpful to demonstrate a few of the most useful tools like how to make lines, group and ungroup sets of lines, double click the line to reshape it through the nodes. They can also bring in photos or graphics to trace and add to the boat design.
Waterproof, Build, Test, Repair and Customize
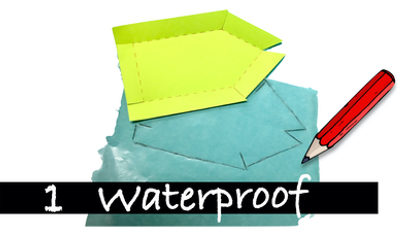
Trace your boat onto wax paper, tin foil or any other waterproofing material you have on hand.
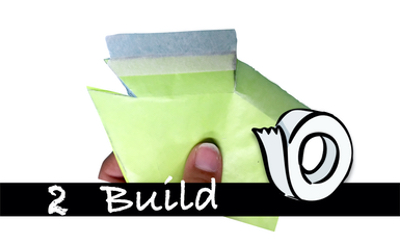
Fold the boat and tape all the open edges of your paper and waterproofing layers together. You can also use spray adhesive to join the layers. Play with joining tabs at an angle to give the boat a different shape.
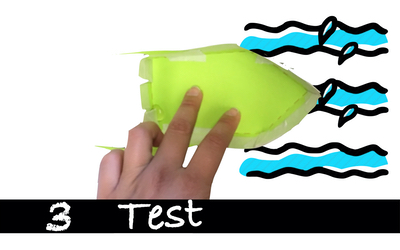
Test it out in some water! Encourage lots of tests like putting things inside to see what it can carry, pushing it to see if it goes straight, checking for leaks, etc.
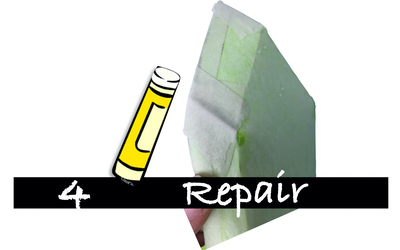
Repair any leaks you find by drying off the area and adding more tape or glue, or some bubble gum maybe?
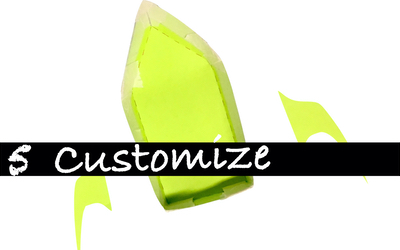
Customize your boat with add-on designs or by naming it. Or, many students decide to make a new boat with new ideas.
Iterate and Elaborate
We find that youth often want to build a second boat after the first. The second boat is usually more ornately decorated and they often correct things that didn’t work out the first time. Facilitators can help youth notice what aspects of the first design are and aren’t working so that they consider them in their next design. For example, if water splashed into the back of the boat where it is flat and squared, they can copy the pointed front to the back so that it lifts up on both sides. Or they can add wings or make it’s shape more closely resemble a particular kind of boat that they know. Below are some examples and possibilities with a few tips for how they were made:
MOTORS & MECHANISMS

There are many ways paper boats can be propelled in the water. Rubber band motors or electric motors can be attached to fans, under water rudders, or even complicated oar systems. Adding motors can be especially helpful for workflow when you’re working with larger groups of students.
To avoid long lines waiting for the craft cutter, some students can start with connecting their circuit and building their motorized propulsion. We’ve had the most luck with using small hobby motor fans mounted to the back of like a swamp boat. Here we share three models built at the Environmental Science Workshop in Watsonville. But we’d love to see what your students came up with as well! Email them to high.tech.low.cost.ed@gmail.com and we’ll include them in the online version of this guide here.
Basic Motor Circuit & Materials needed
Swamp Boat
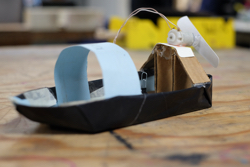 This swamp boat was made by building a cardboard structure to elevate and secure the motor above the water level. It is attached with wires to a AA battery that sits inside the boat. The fan blade is made from a recycled paper coffee cup. If you cut it at a diagonal along the cup, the curve of the cup offers a perfect shape for catching and pushing air away from the boat.
Underwater Propeller
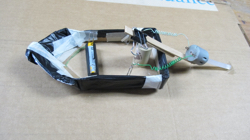 This student made a submerged propeller by attaching a hot glue stick to the end of the motor shaft. It’s also adjustable! The bind clip holds the popsicle stick attached to the motor to another popsicle stick attached to the boat. The motor can be lowered and raised to experiment with the right position.
Row Boat
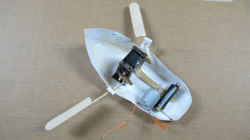 This is an ambitious double oar design! The motor is attached to the inside of the boat together with the battery. The oars are built into a pulley system between the motor shaft and a wheel that drives both oars in a circular motion. This, like most motorized boats, needed some reinforcement to make the bottom of the boat less flexible.
Gustavo Hernandez
Watsonville Environmental Science Workshop

“We used to make boats out of reused plastic bottles and styrofoam, material that already floats. but we no longer want to use materials that are not biodegradable, as our recycling gets shipped somewhere else becoming another country's problem. Eventually the entire world's problem. We want people to realize that we can actually use many things that will be less affecting to the environment and without consuming too much. So we have to adapt…everything can float! This brought up a bigger question: We have never tried to make boats out of just anything. I ask them can a piece of rock float? And I say ‘well yes it can, it all depends on how you shape it. It’s all about the shape, it’s not about the material.’
I chose paper to make our boat projects because paper was already in every single recycling bin at every school that we go to. And it also proves to the students that every type of material can float, even paper. The shape that you give to the material is the important aspect. Another part of the science is to make this material water resistant by covering them with wax paper or foil.”
CONNECTIONS TO CULTURE, HISTORY AND MIGRATION
Boats can invoke personal memories, family histories and cultural identities. They can carry us long distances, marking significant change in our lives, they can provide economic subsistence locally, or bring us joy and adventure. Working on boat designs with youth can be a good opportunity to listen to their stories and encourage them to connect with the cultural and historical connections they or their families have with water and travel. For example, Gustavo, one of the co-authors of this guide recalls the names of the fishing boats he grew up seeing in Mexico. The humor and care taken in giving the boats names recognizes the relationship a pescador has with their boat.
SPATIAL REASONING
The boat building project gives students an opportunity to work with physical materials and their bodies to engage with science. Through this, they can both get a feeling for materials like foil, paper, and water and how they work together and develop a feeling for what it means to discover - for one’s self - scientific principles through activity (Reggio Emilia). The pleasure from splashing in water, the joy from successfully making a boat that can float, or being “pleasantly frustrating” as kids push up against the edge of what they know and can do (Gee, 2003), are all feelings that drive curiosity about the world and how it works. As the educator and researcher Eleanor Duckworth (1972) explains, our job as educators must involve, “…familiariz(ing) children with a few phenomena in such a way as to catch their interest, to let them raise and answer their own questions, to let them realize that what they can do is significant — so that they have the interest, the ability, and the self-confidence to go on by themselves” (p. 225).
In addition to connecting to young people’s interests, we ask young people to create two-dimensional shapes on the computer, visualize what they will look like in three-dimensions, tell the computer to cut out the shapes they design, and then construct the boat in three-dimensions. This is an important spatial skill connected to both math and engineering practices (Cheng & Mix, 2012).
The Boat project connects to many scientific concepts including density, buoyancy, and motion (in the case of motors). The project also allows learners to engage in practices valued in science such as observing, predicting, trying something out (or more formally, experimenting), modeling, and documenting what works and does not work (representing). Creating opportunities for engaging in these practices is valuable, but can be enhanced significantly through facilitator pedagogy, specifically how they notice what learners are doing, ask questions, and suggest next steps (Sawyer, 2007). There are also scientific practices embedded in inquiry (Manz, 2015). Here is a link to her complete article.

HOW IS IT High Tech Low Cost?

We use the term High Tech Low Cost for projects that use “high-tech, low-cost” digital tools while engaging in high-complexity thinking and creating. We believe that cost shouldn’t be a barrier for meaningfully including technology in creative learning. We use the craft cutter for paper boats because designing digitally allows for precise attention to symmetry and cuts with fine detail. Making the computational thinking skills that young people use translatable to future work that may use 3D rendering software and manufacturing technology. We’ve also found this project to be one of the most iterable designs. A student can improve the design many times without using much materials and without the lengthy repetitive processes that some building can entail.

Thanks to the generous funding of the National Science Foundation.